This page contains some hints and tips for
increasing productivity when using Excel.
Many of these are probably obvious to some people, but maybe others will
learn something they didn't already know and find it useful.
These hints definitely work with Excel 2010 and above but they may also
work with older versions of Excel (we just haven't been able to test on
older versions).
This is in no way an all inclusive cheat sheet but we will be adding to
it as time allows. These hints and tips come as 'out of the box' solutions
and or shortcuts.
In other words they are an integral part of Excel as delivered by Microsoft.
No additional coding is required.
Until then....enjoy!
The usual disclaimers apply.
Quickly Replicate A WorkSheet
There is a quick and easy way to replicate a worksheet without having to go through the usual process.
Simply click on the tab of the worksheet to be duplicate and hold down the "CTRL" key, then drag the mouse to where you want the new sheet and "Viola!".
If you wish to see a YouTube video demonstrating how to quickly replicate a worksheet click the button below.
Snapping an Object to the Grid
Instead of trying to manually line objects up by hand, simply hit the "Alt" key whilst keeping the object highlighted.
The object will then snap to the nearest grid lines.
If you wish to see a YouTube video demonstrating how to quickly snap a worksheet object to the cell grid click the button below.
Autofilling Cells
Excel has some pretty neat auto fill capabilities that can save lots of time and effort.
It can autofill, days of the week, dates, times, month names and numeric progressions (incrementing or decrementing) to name but a few.
The usual method of achieving this is by typing the initial value or values and them dragging the plus sign in the bottom right side corner of the cell. You can drag in any direction (up, down, right, or left).
If you drag "up" or "left" the values will be in the reverse direction. i.e. if you type "Monday" in a cell and drag "left" or "up" the adjacent cells will start work backwards from Monday so the immediately adjacent cell will read "Sunday".
If you wish to see a YouTube video demonstrating how to use Autofill click the button below.
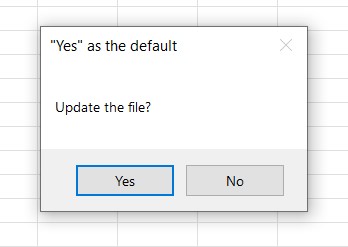
This, of course, is fine if you want the default response to be "Yes", but what if you want the default to be "No"?
The answer is to use the "vbDefaultButtonn" option.
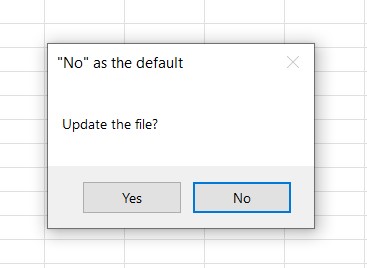
The vbDefaultButton should be added to the MsgBox type (i.e vbYesNo). The n value will depend on which button you want to make the default. To make "No" the default for the vbYesNo option you would code:
Message = MsgBox("Update the file?", vbYesNo + vbDefaultButton 2 , """No"" as the default")
This would result in the following message box being displayed:
If the MsgBox option has 3 buttons and you want to make the third button the default, you would use vbDefaultButton 3 .